StageLight is a powerful app for iPads, offering features that can be unlocked via Managed App Configurations. If you’re an IT administrator at a school using Jamf School, this guide will walk you through the process of deploying StageLight and configuring it for your institution.
Step 1: Add StageLight to Jamf School
- Log in to Jamf School.
- Navigate to Apps in the sidebar.
- Click on + Add App.
- Search for StageLight in the App Store and select it.
- Click Save to add the app to your library.
Step 2: Assign StageLight to Devices
- Go to Devices in the sidebar.
- Select the devices or device groups where you want to install StageLight.
- Click on Actions → Assign Apps.
- Choose StageLight from the list.
- Confirm the assignment to ensure StageLight is deployed to the selected devices.
Step 3: Configure Managed App Configuration
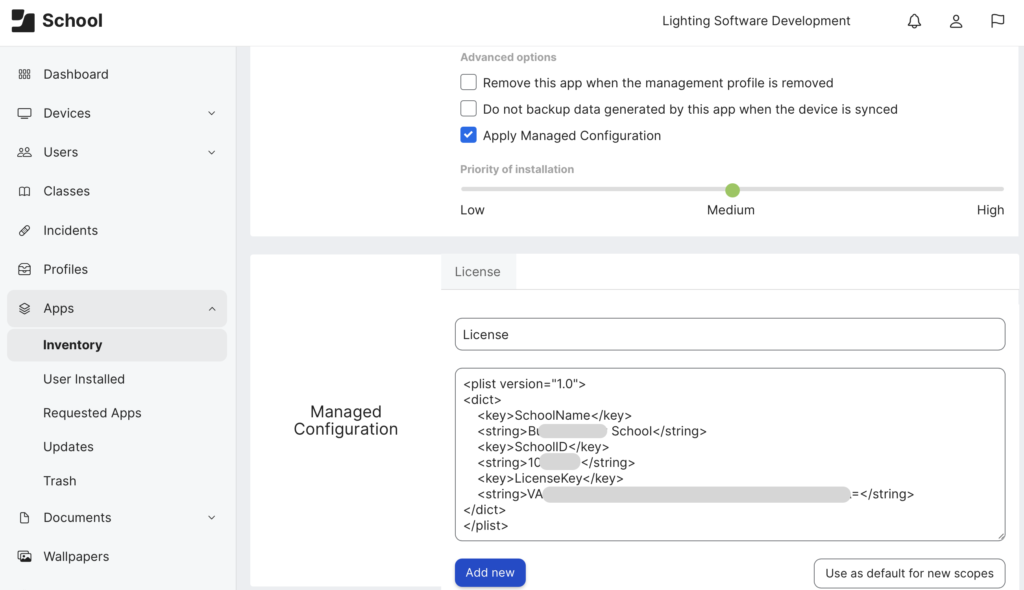
Managed App Configurations allow you to personalize the StageLight app for your school by preloading critical settings, such as the school name, ID, and license key. Follow these steps to configure it:
1. Open the App Configuration
- Navigate back to Apps in Jamf School.
- Click on StageLight in the list.
- Scroll down to the Managed Configuration section.

2. Enter the Configuration Data
In the Managed Configuration field, paste the following XML, customized for your school:
<?xml version="1.0" encoding="UTF-8"?>
<!DOCTYPE plist PUBLIC "-//Apple//DTD PLIST 1.0//EN" "http://www.apple.com/DTDs/PropertyList-1.0.dtd">
<plist version="1.0">
  <dict>
    <key>SchoolName</key>
    <string>Your School Name</string>
    <key>SchoolID</key>
    <string>Your School ID</string>
    <key>LicenseKey</key>
    <string>Your License Key</string>
  </dict>
</plist>- Replace
Your School Namewith your school’s name (e.g., „Marie-Curie-Gymnasium“). - Replace
Your School IDwith the unique ID assigned to your school (e.g., „1059937“). - Replace
Your License Keywith the license key provided to you by the StageLight team.
3. Save the Configuration
- After entering the XML, click Save.
Step 4: Sync Configuration to Devices
- Ensure the devices have received the StageLight app from Jamf School.
- To push the configuration to devices:
- Go to Devices, select the devices with StageLight installed, and click Sync.
- This will ensure the Managed Configuration is applied.
Step 5: Verify the Configuration
To confirm the Managed App Configuration is working:

- Open StageLight on a managed iPad.
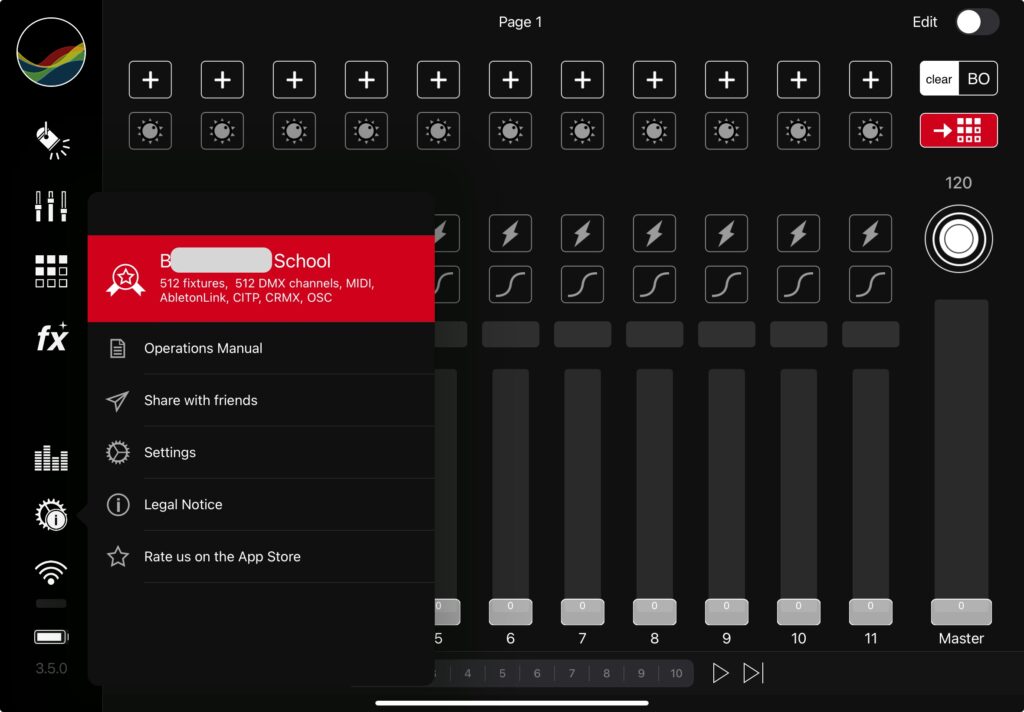
- The app should automatically read the configuration and display the school’s name and license information.
- If the app does not recognize the configuration:
- Check the Jamf School console to ensure the configuration was correctly applied.
- Verify the syntax of the PLIST XML in the Managed Configuration.

