Cues are central elements in theater lighting. In the 2nd tutorial of the theater series, I present the cue concept of the StageLight app.
The first tutorial in this series focused on spotlight alignment, patching, and grouping in StageLight. In the following tutorial, I will go into creating cues and which modes are supported.
Tracking vs cue only
There are two different systems for storing cues: „tracking“ and „cue-only“.
With „tracking“ only the changes to the previous cue are saved. This makes the cue smaller, but it has to be played in the right order, otherwise, it won’t work. With “cue-only” complete images are always saved. This also allows a change in the course of the show or jumping or repeating, for example, during a rehearsal.
Cues in StageLight
In principle, both models can be realized in StageLight. The only difference is that the values of a cue are only active as long as the cue is active. I.e. you would have to leave the cues on for the tracking, which would no longer be very performant with a certain number of cues. That said, if you have a lot of cues, I would always use cue-only.
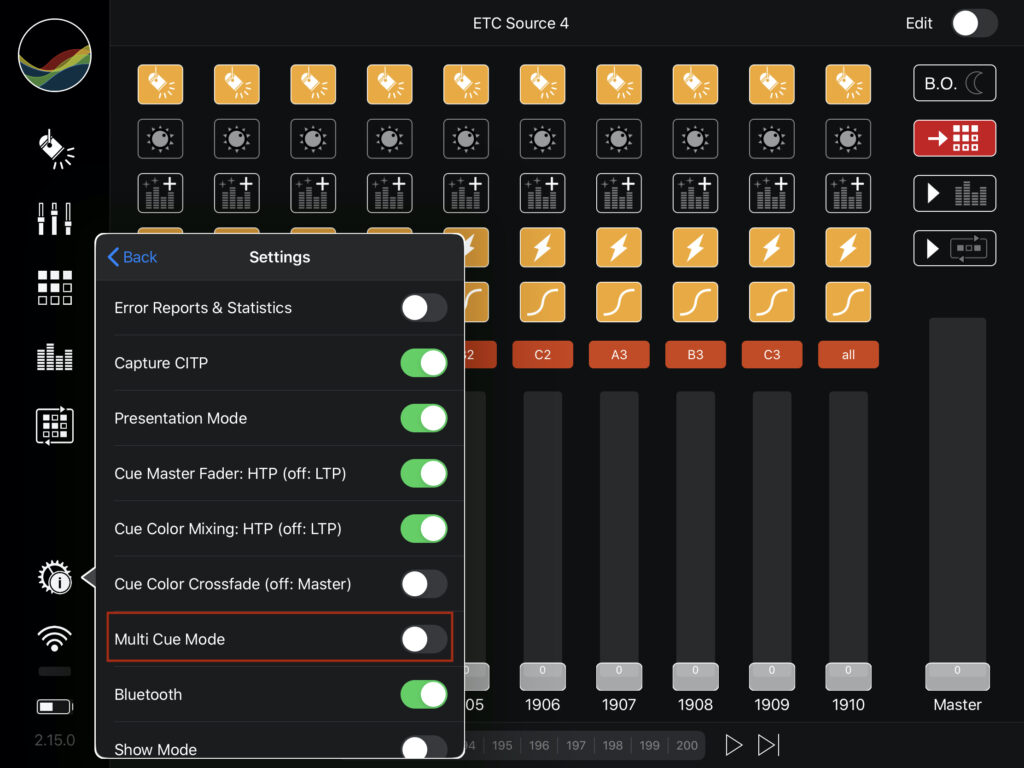
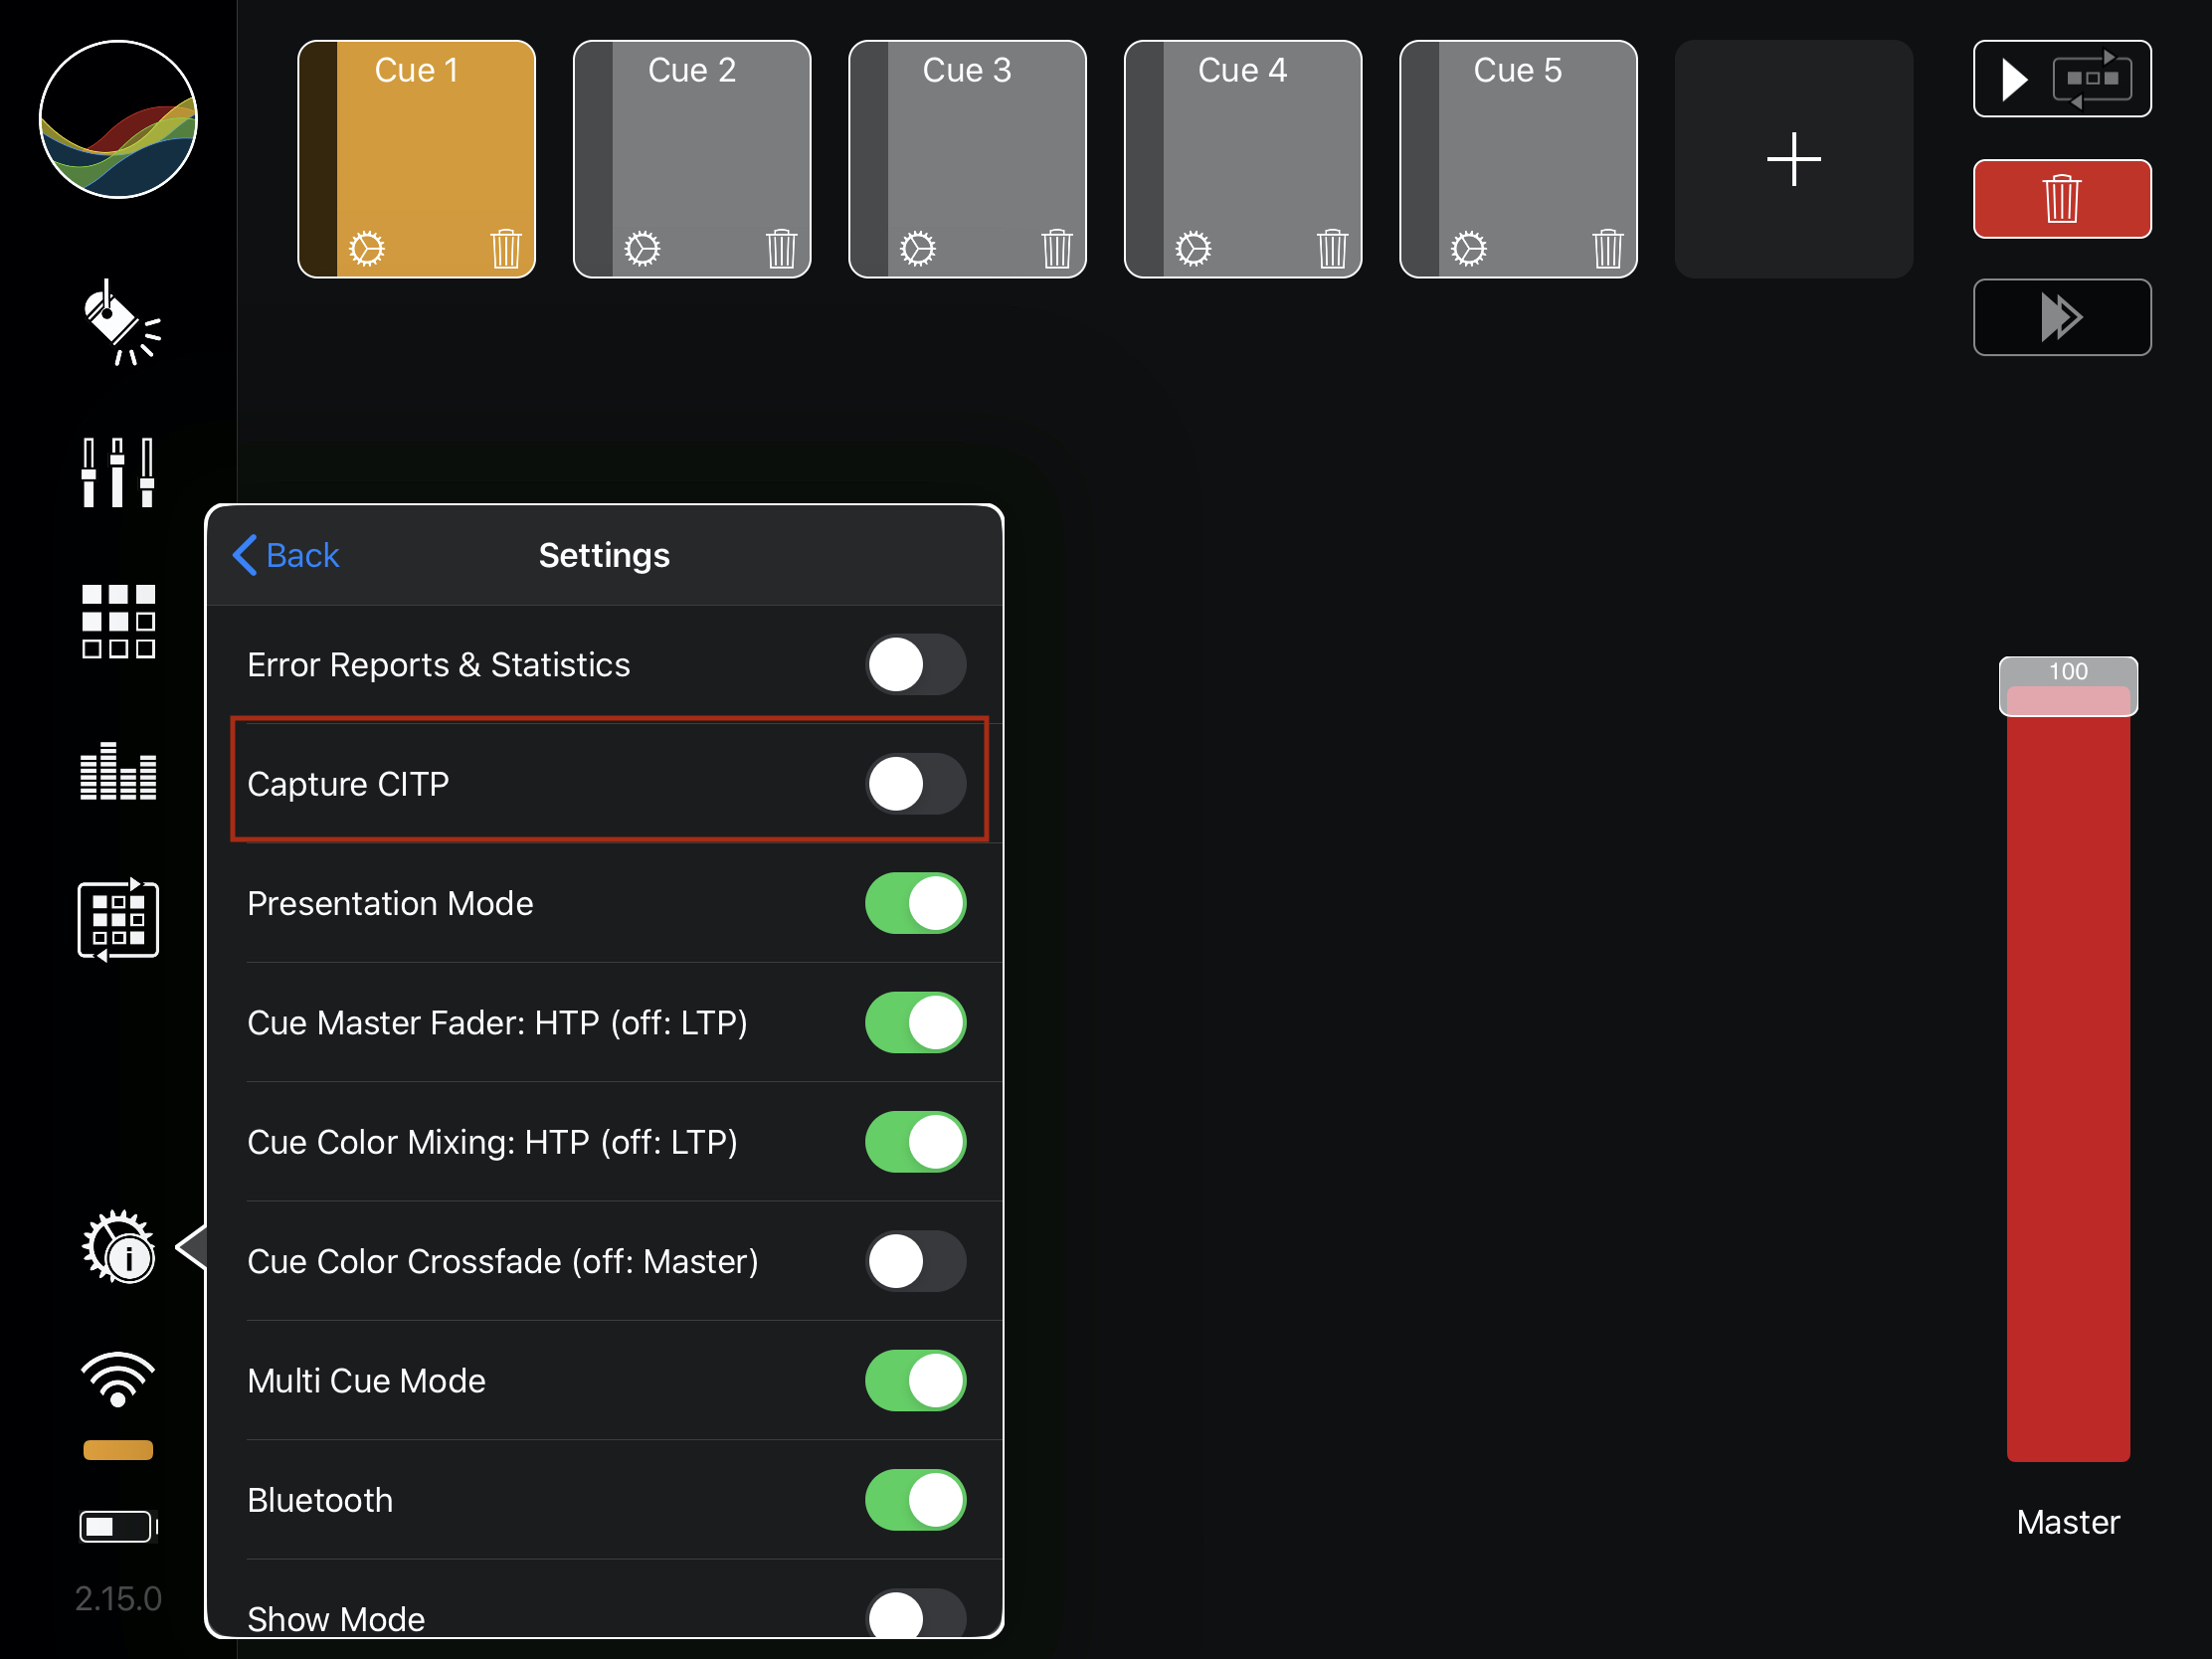
Let’s see it all with an example. Since multiple cues must be active for tracking, this only works in „multi-cue mode“. This is the default mode, which can be activated in the settings menu if this is not the case.
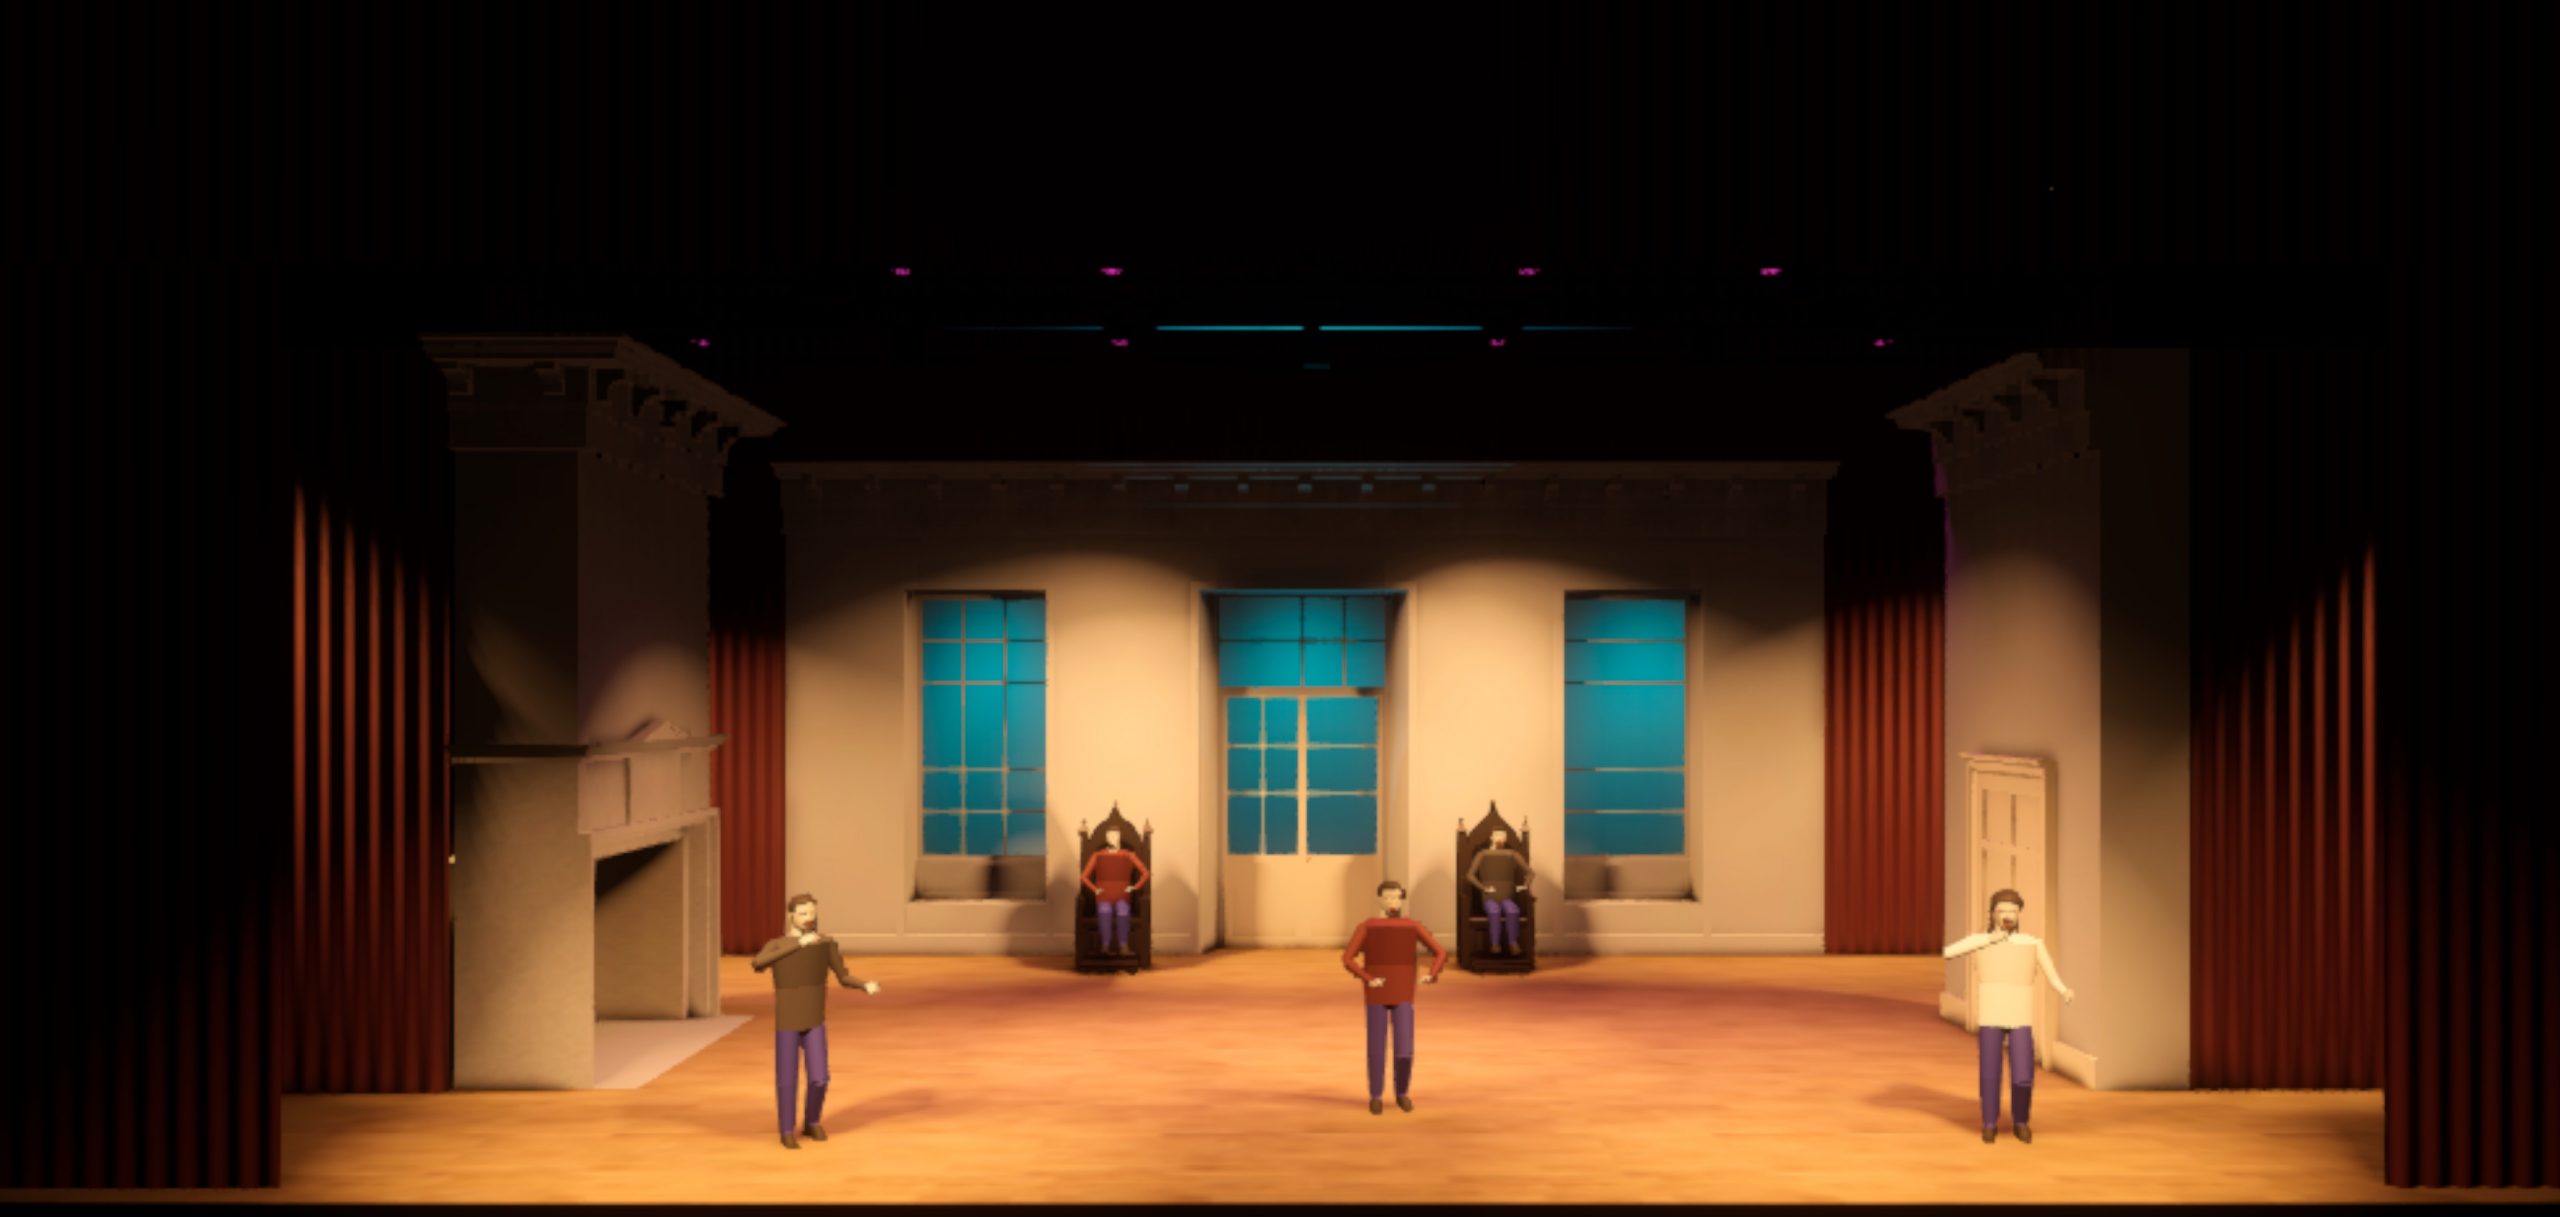
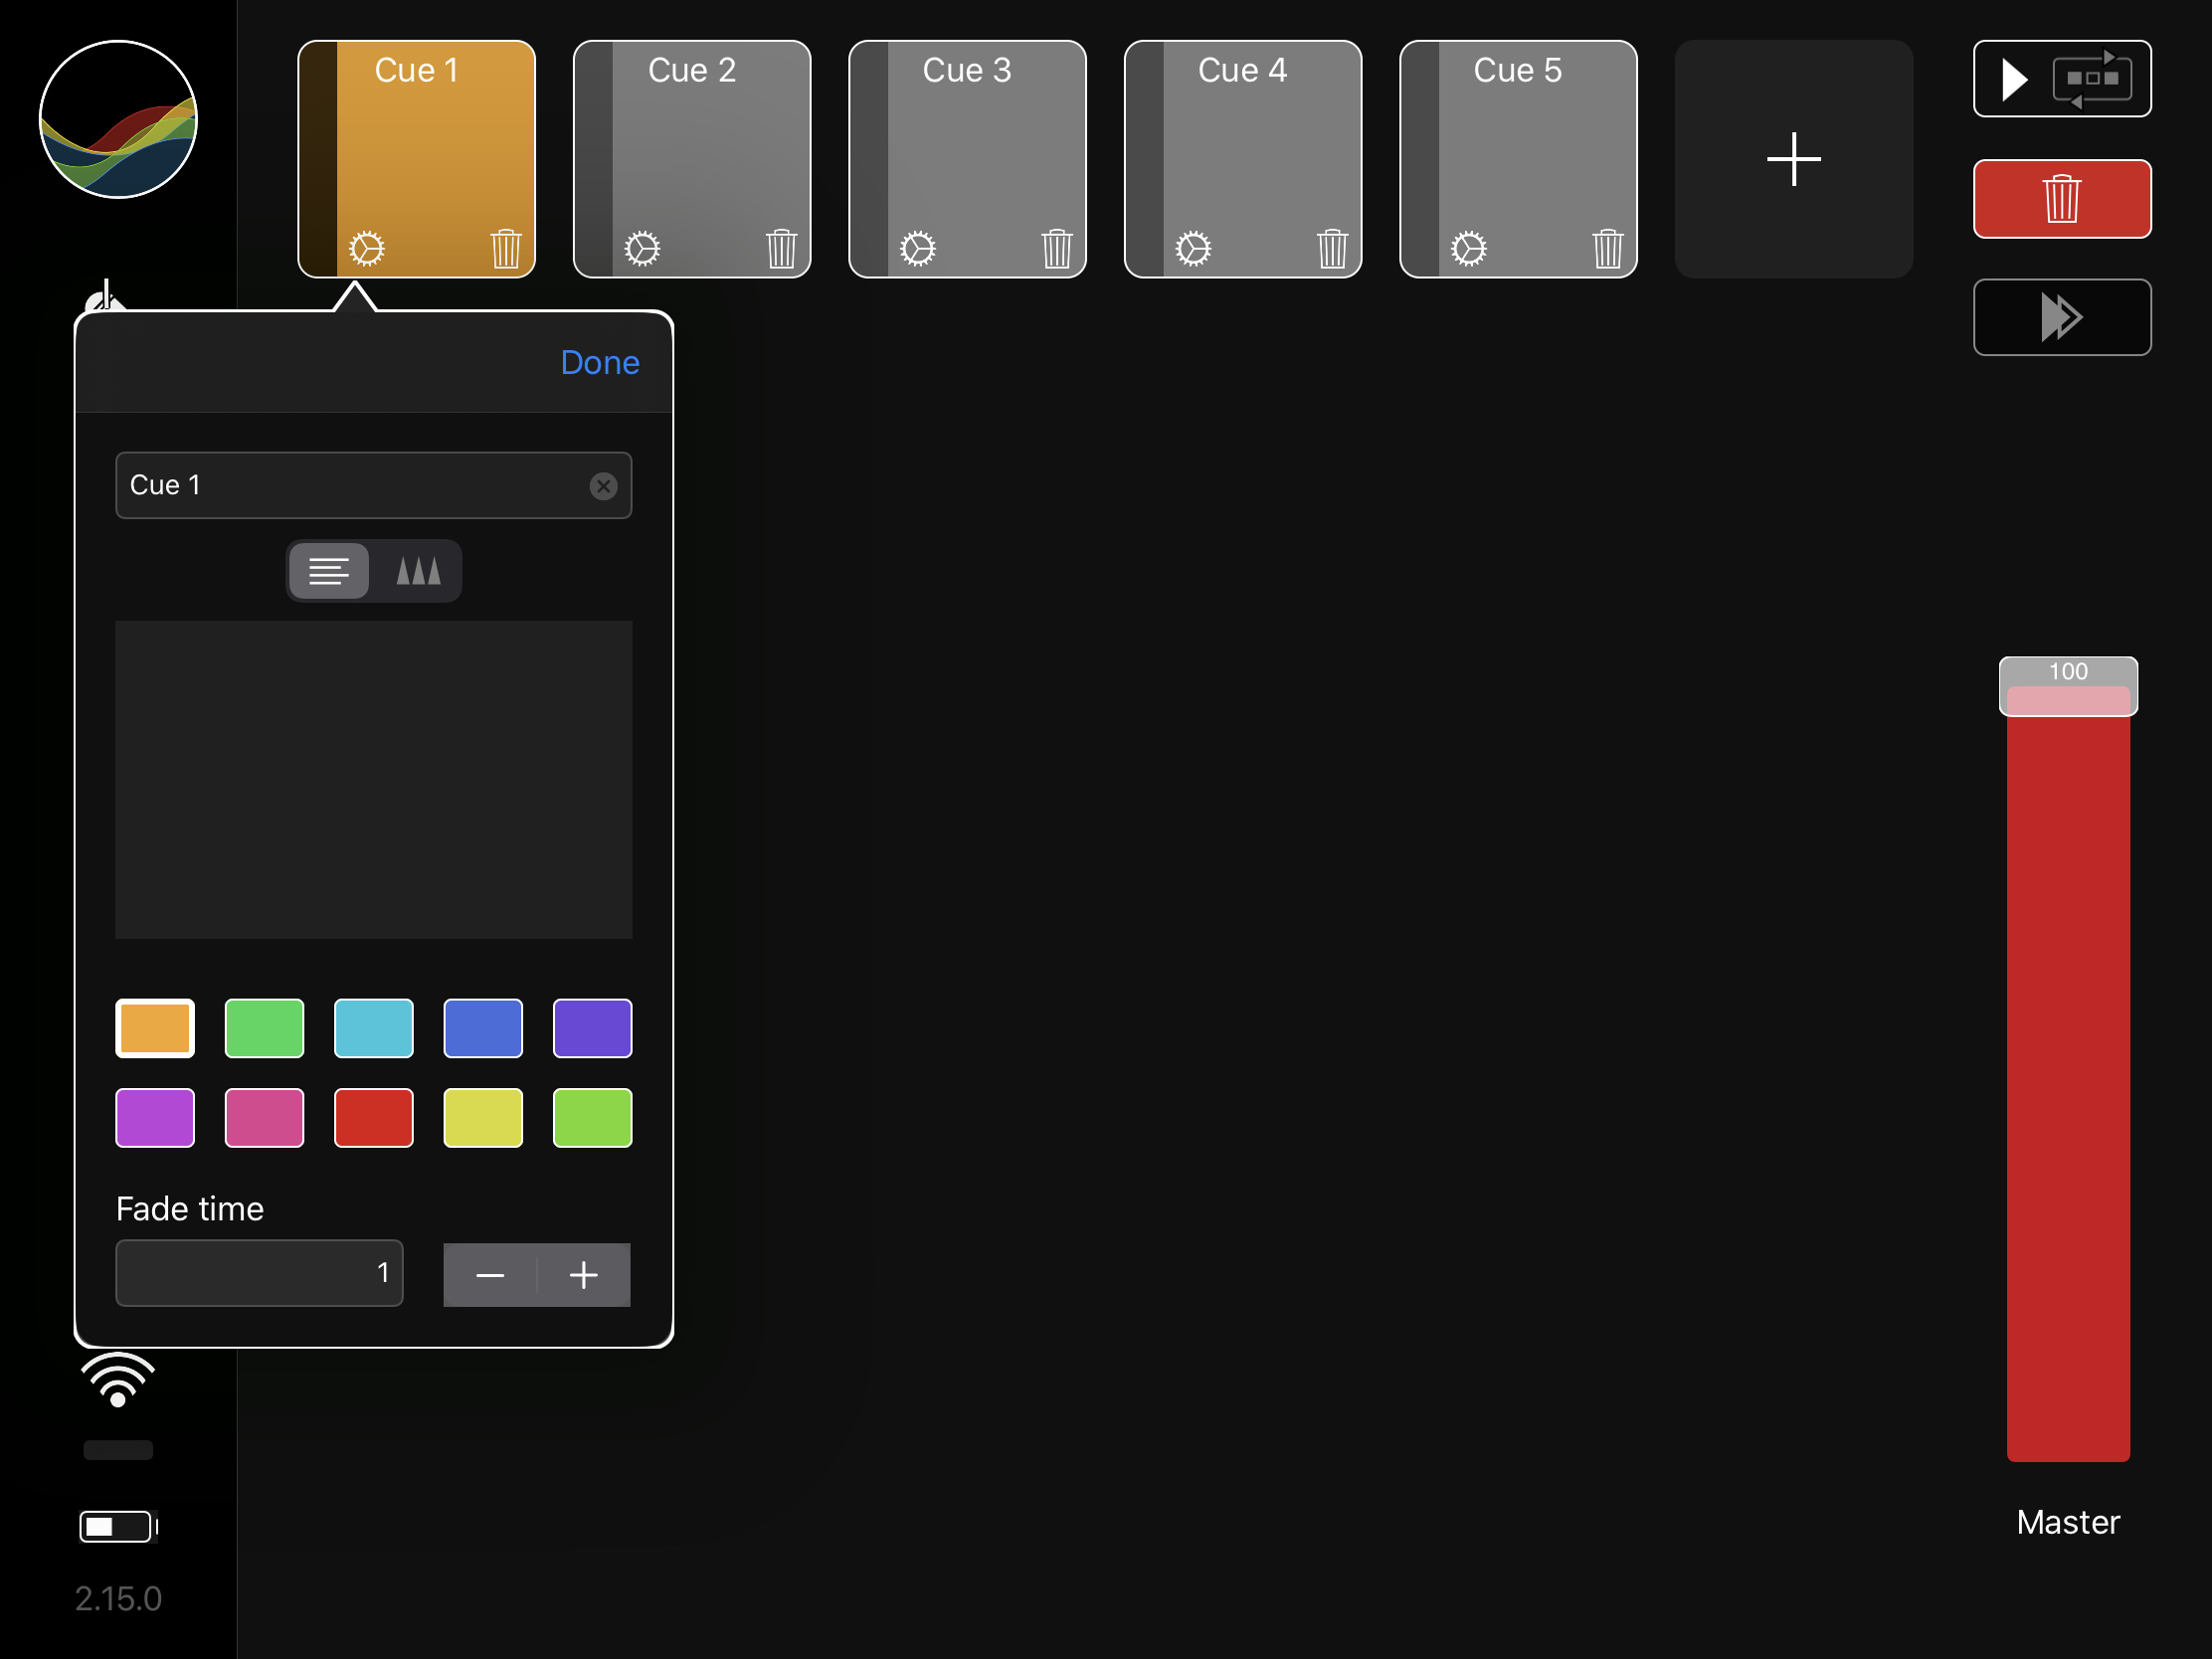
I record 3 cues that build on each other and of course I start with cue 1.
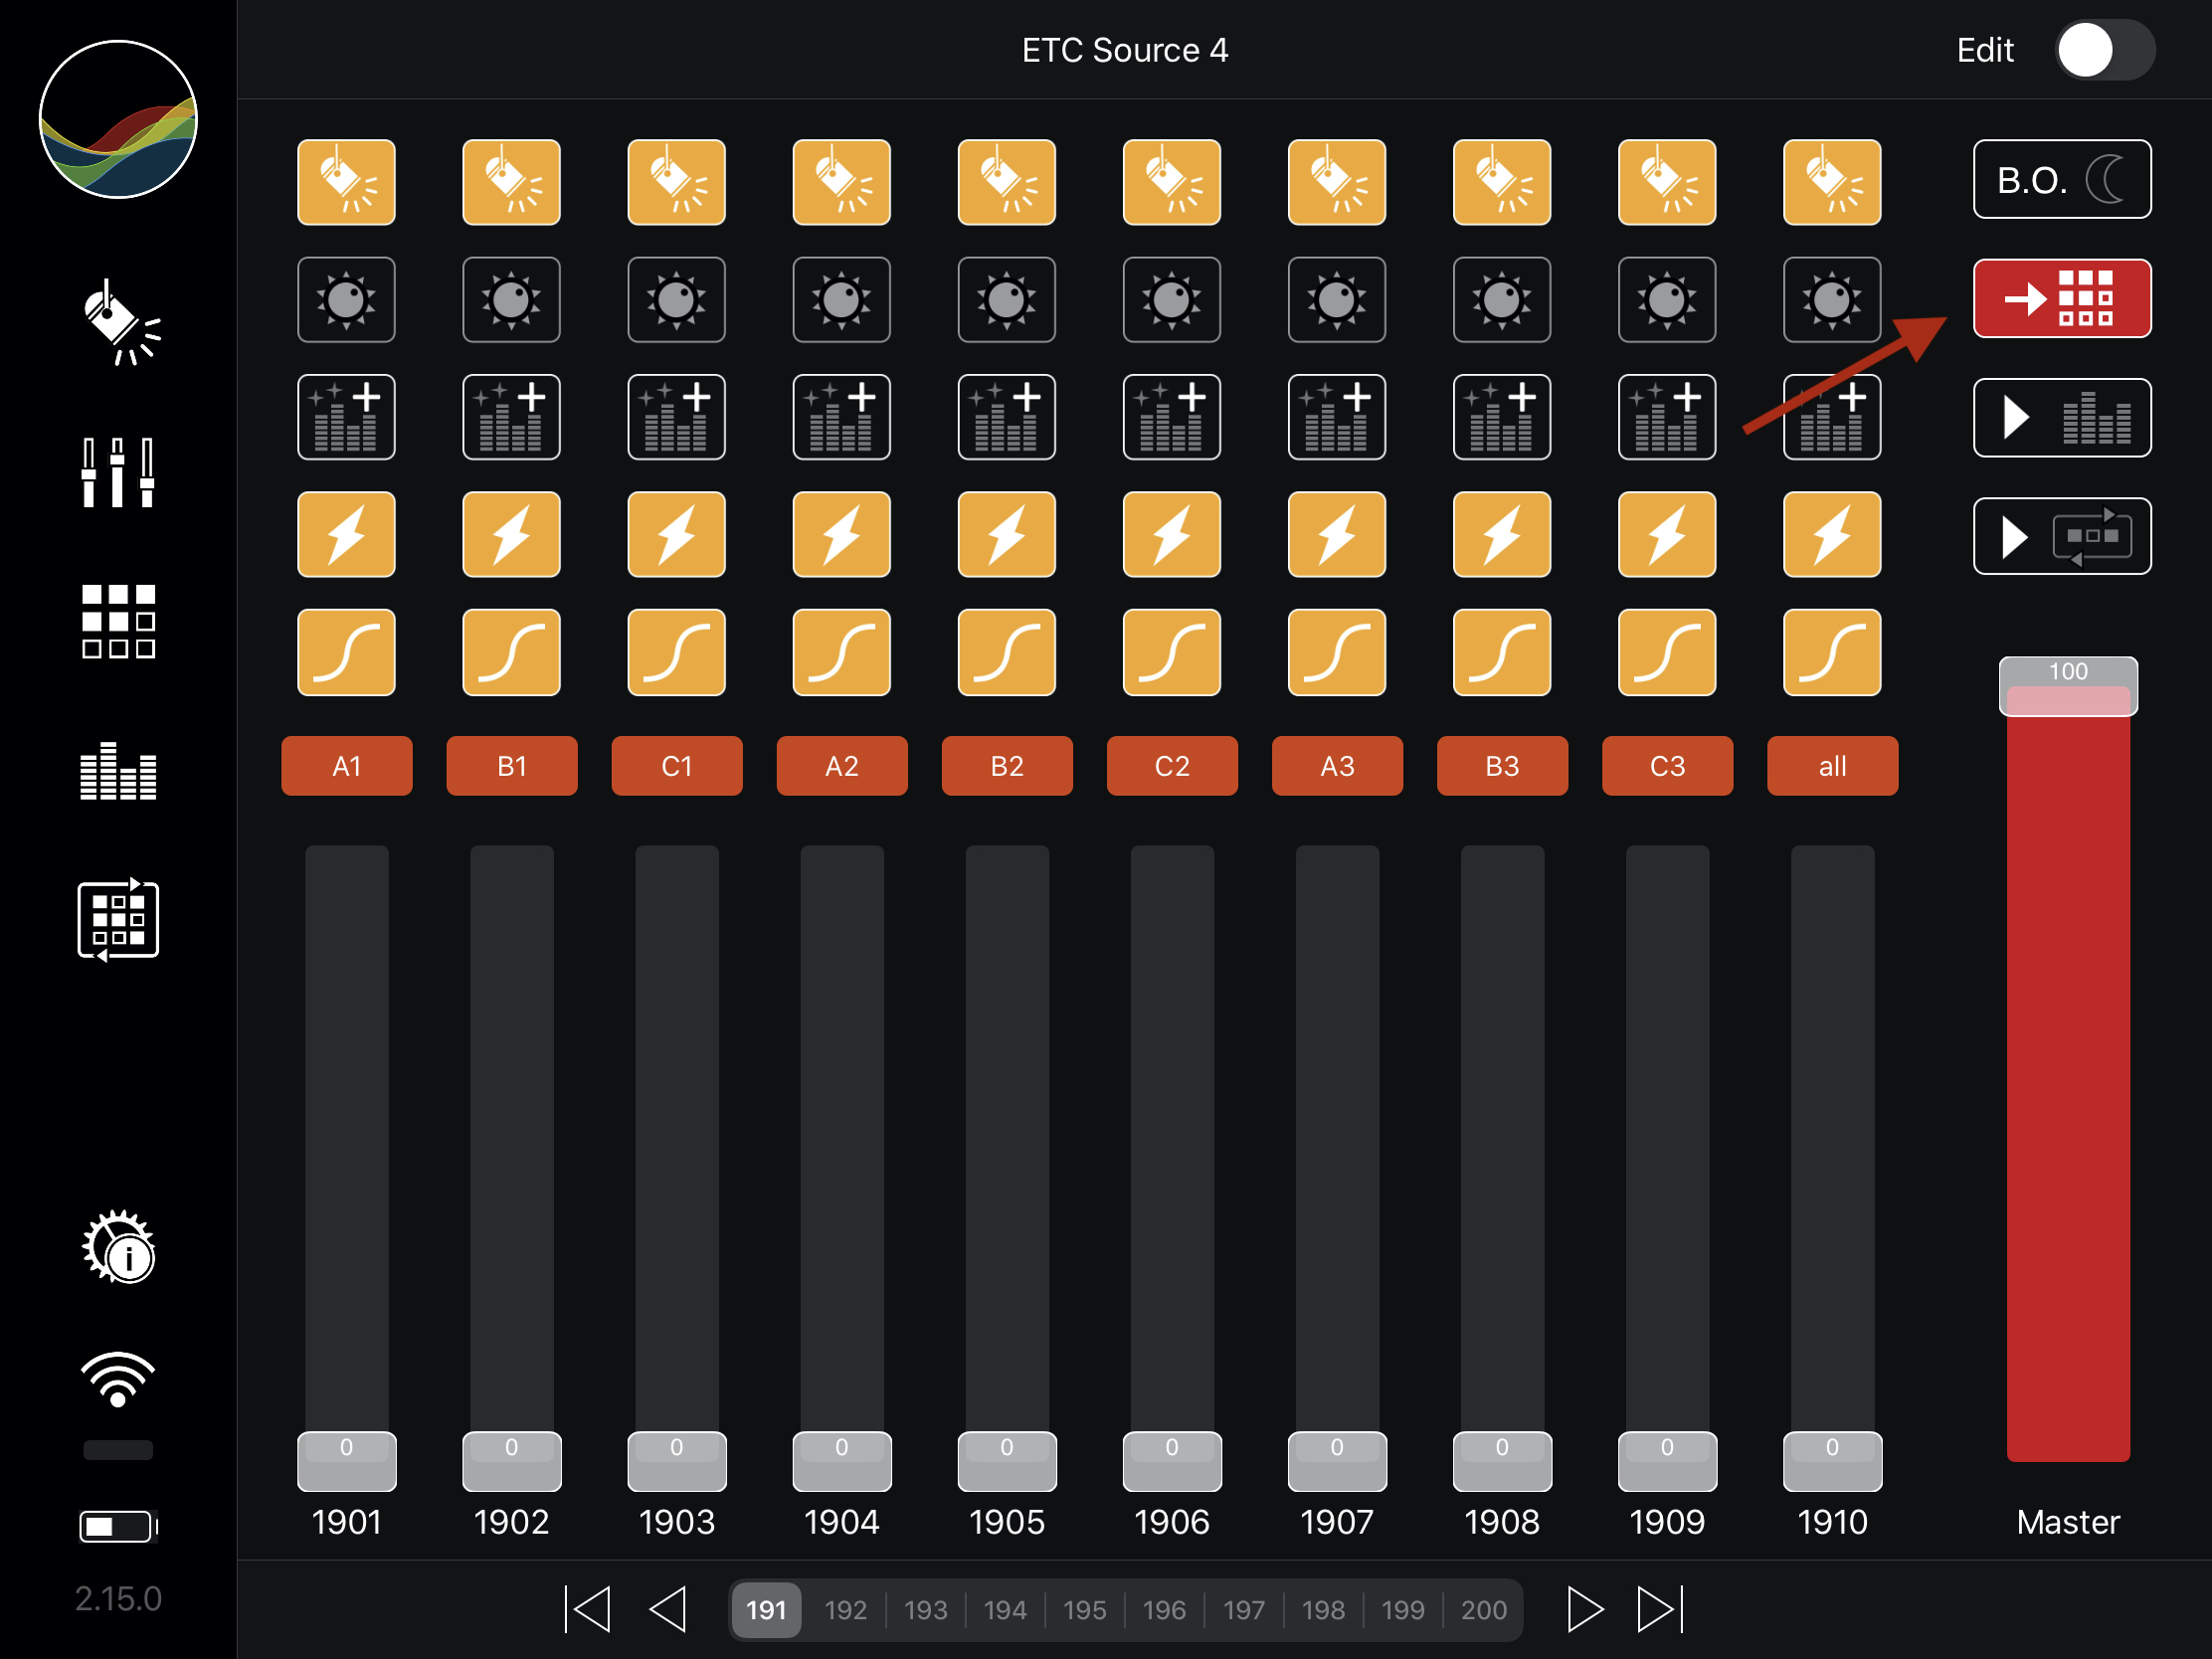

- Tap on the „Record-Cue“ button, it starts flashing, from now on all changes in the DMX values will be recorded
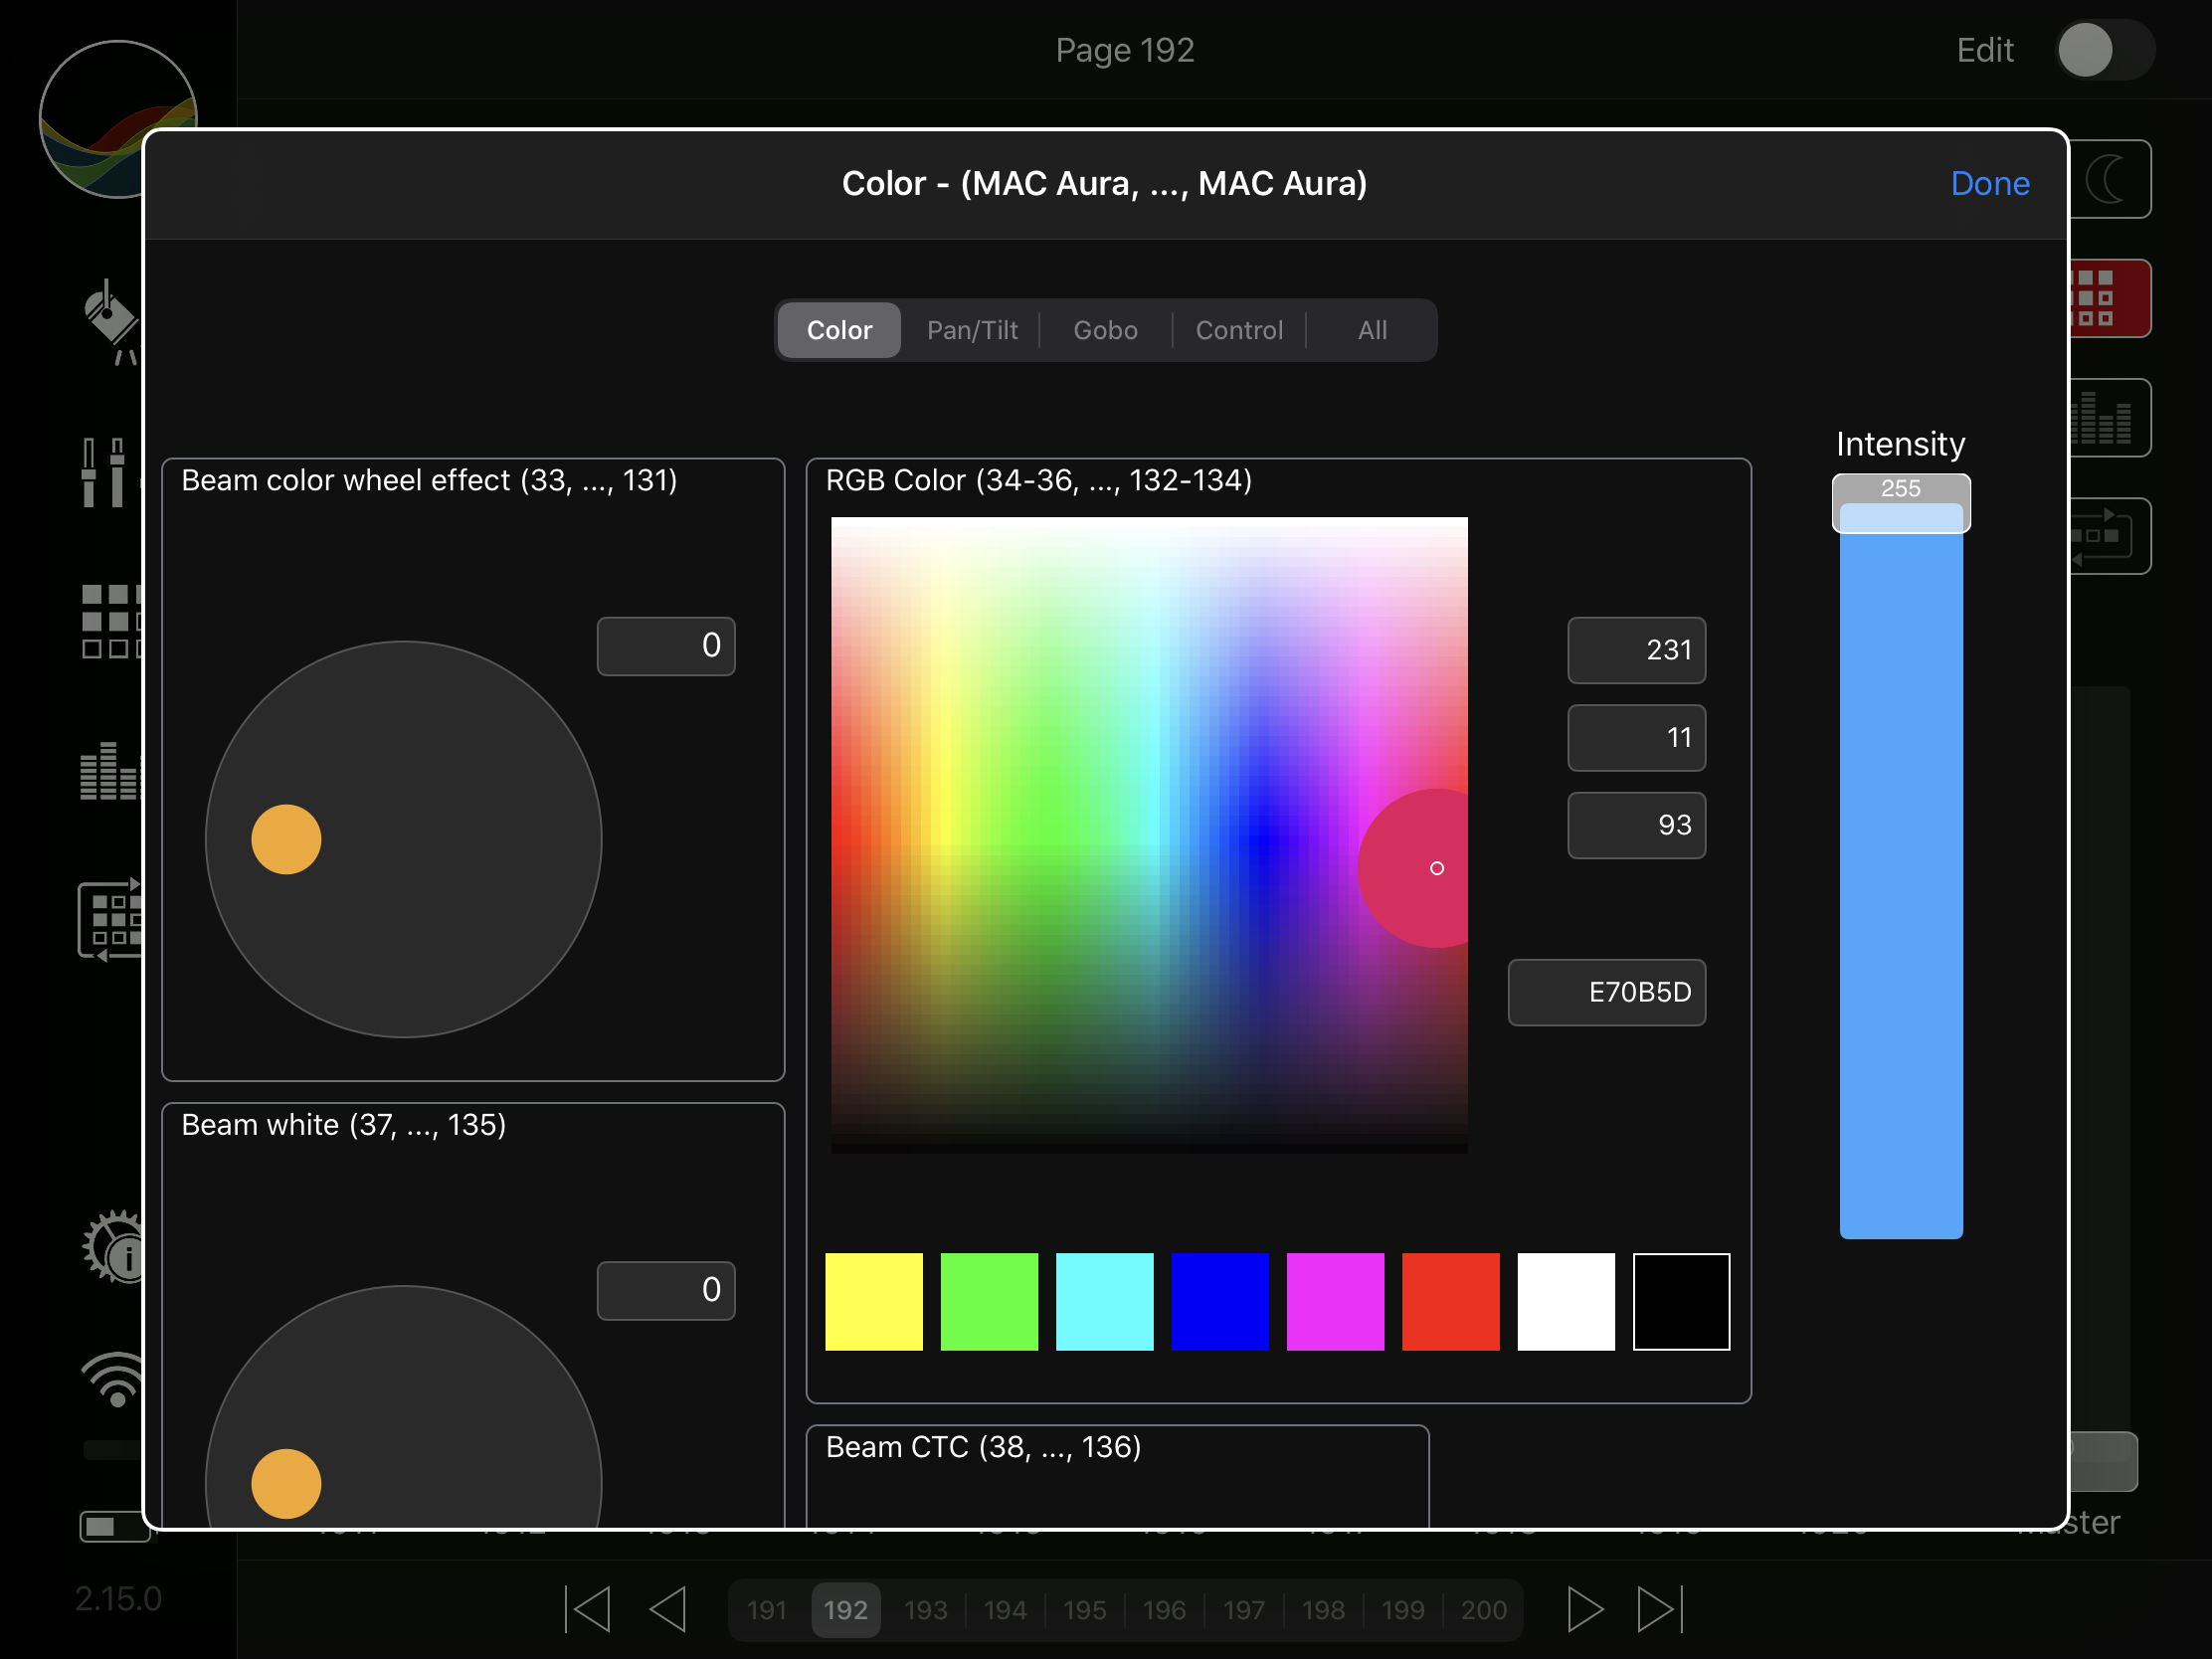
- Modify the color
- Tap the „Record-Cue Button“ again to save the changes as a cue
With this, I have created the first cue and I repeat these steps for cues 2 and 3. In cue 2 I set the window lighting and in cue 3 I set the headlights to position B1 (see part 1).
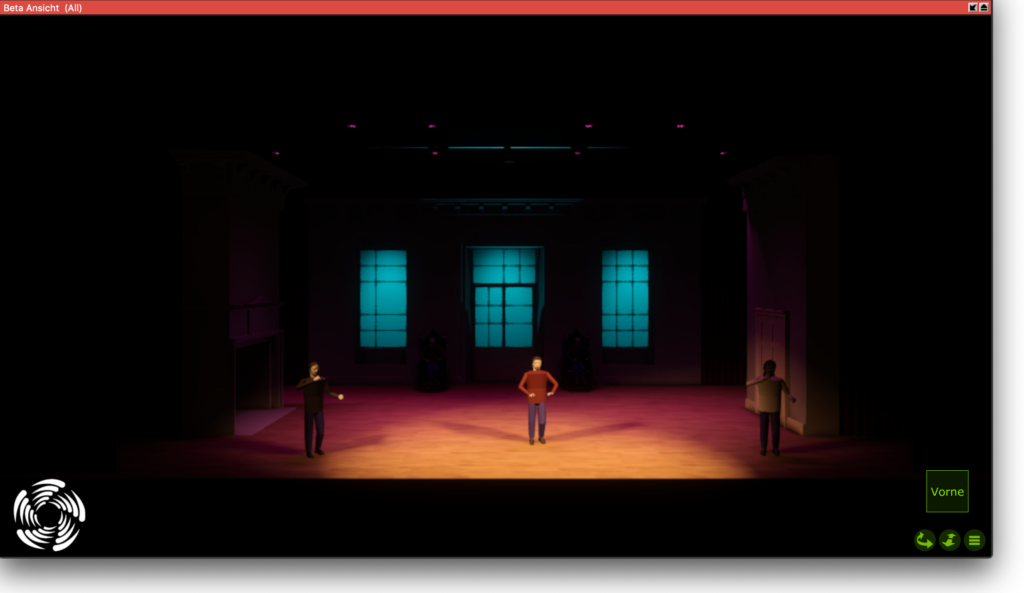
If I now activate cues 1, 2, and 3 one after the other, the result looks exactly like in the Capture Visualizer.
Let’s move on to cue only. For this, I record two more cues. For cue 4 I use cues 1-3 as a kind of construction kit.
- Tap on the „Record-Cue Button“, it will start blinking
- Activate cues 1-3
- Tap the „Record-Cue Button“ again to save the changes as a cue
I record cue 5 analogous to cues 1-3 with the controls and faders of the fixtures and groups. In order to play these two cues, we recommend the „single cue mode“ which can be set in the menu by deactivating the „multi cue mode“. Now only one cue is active at a time. In addition, you can use the Next button to activate the subsequent cue.
The following 3 tips will help you to keep track of the cues:
- Using colored cue buttons
- Use of descriptive names
- Use of thumbnails via CITP
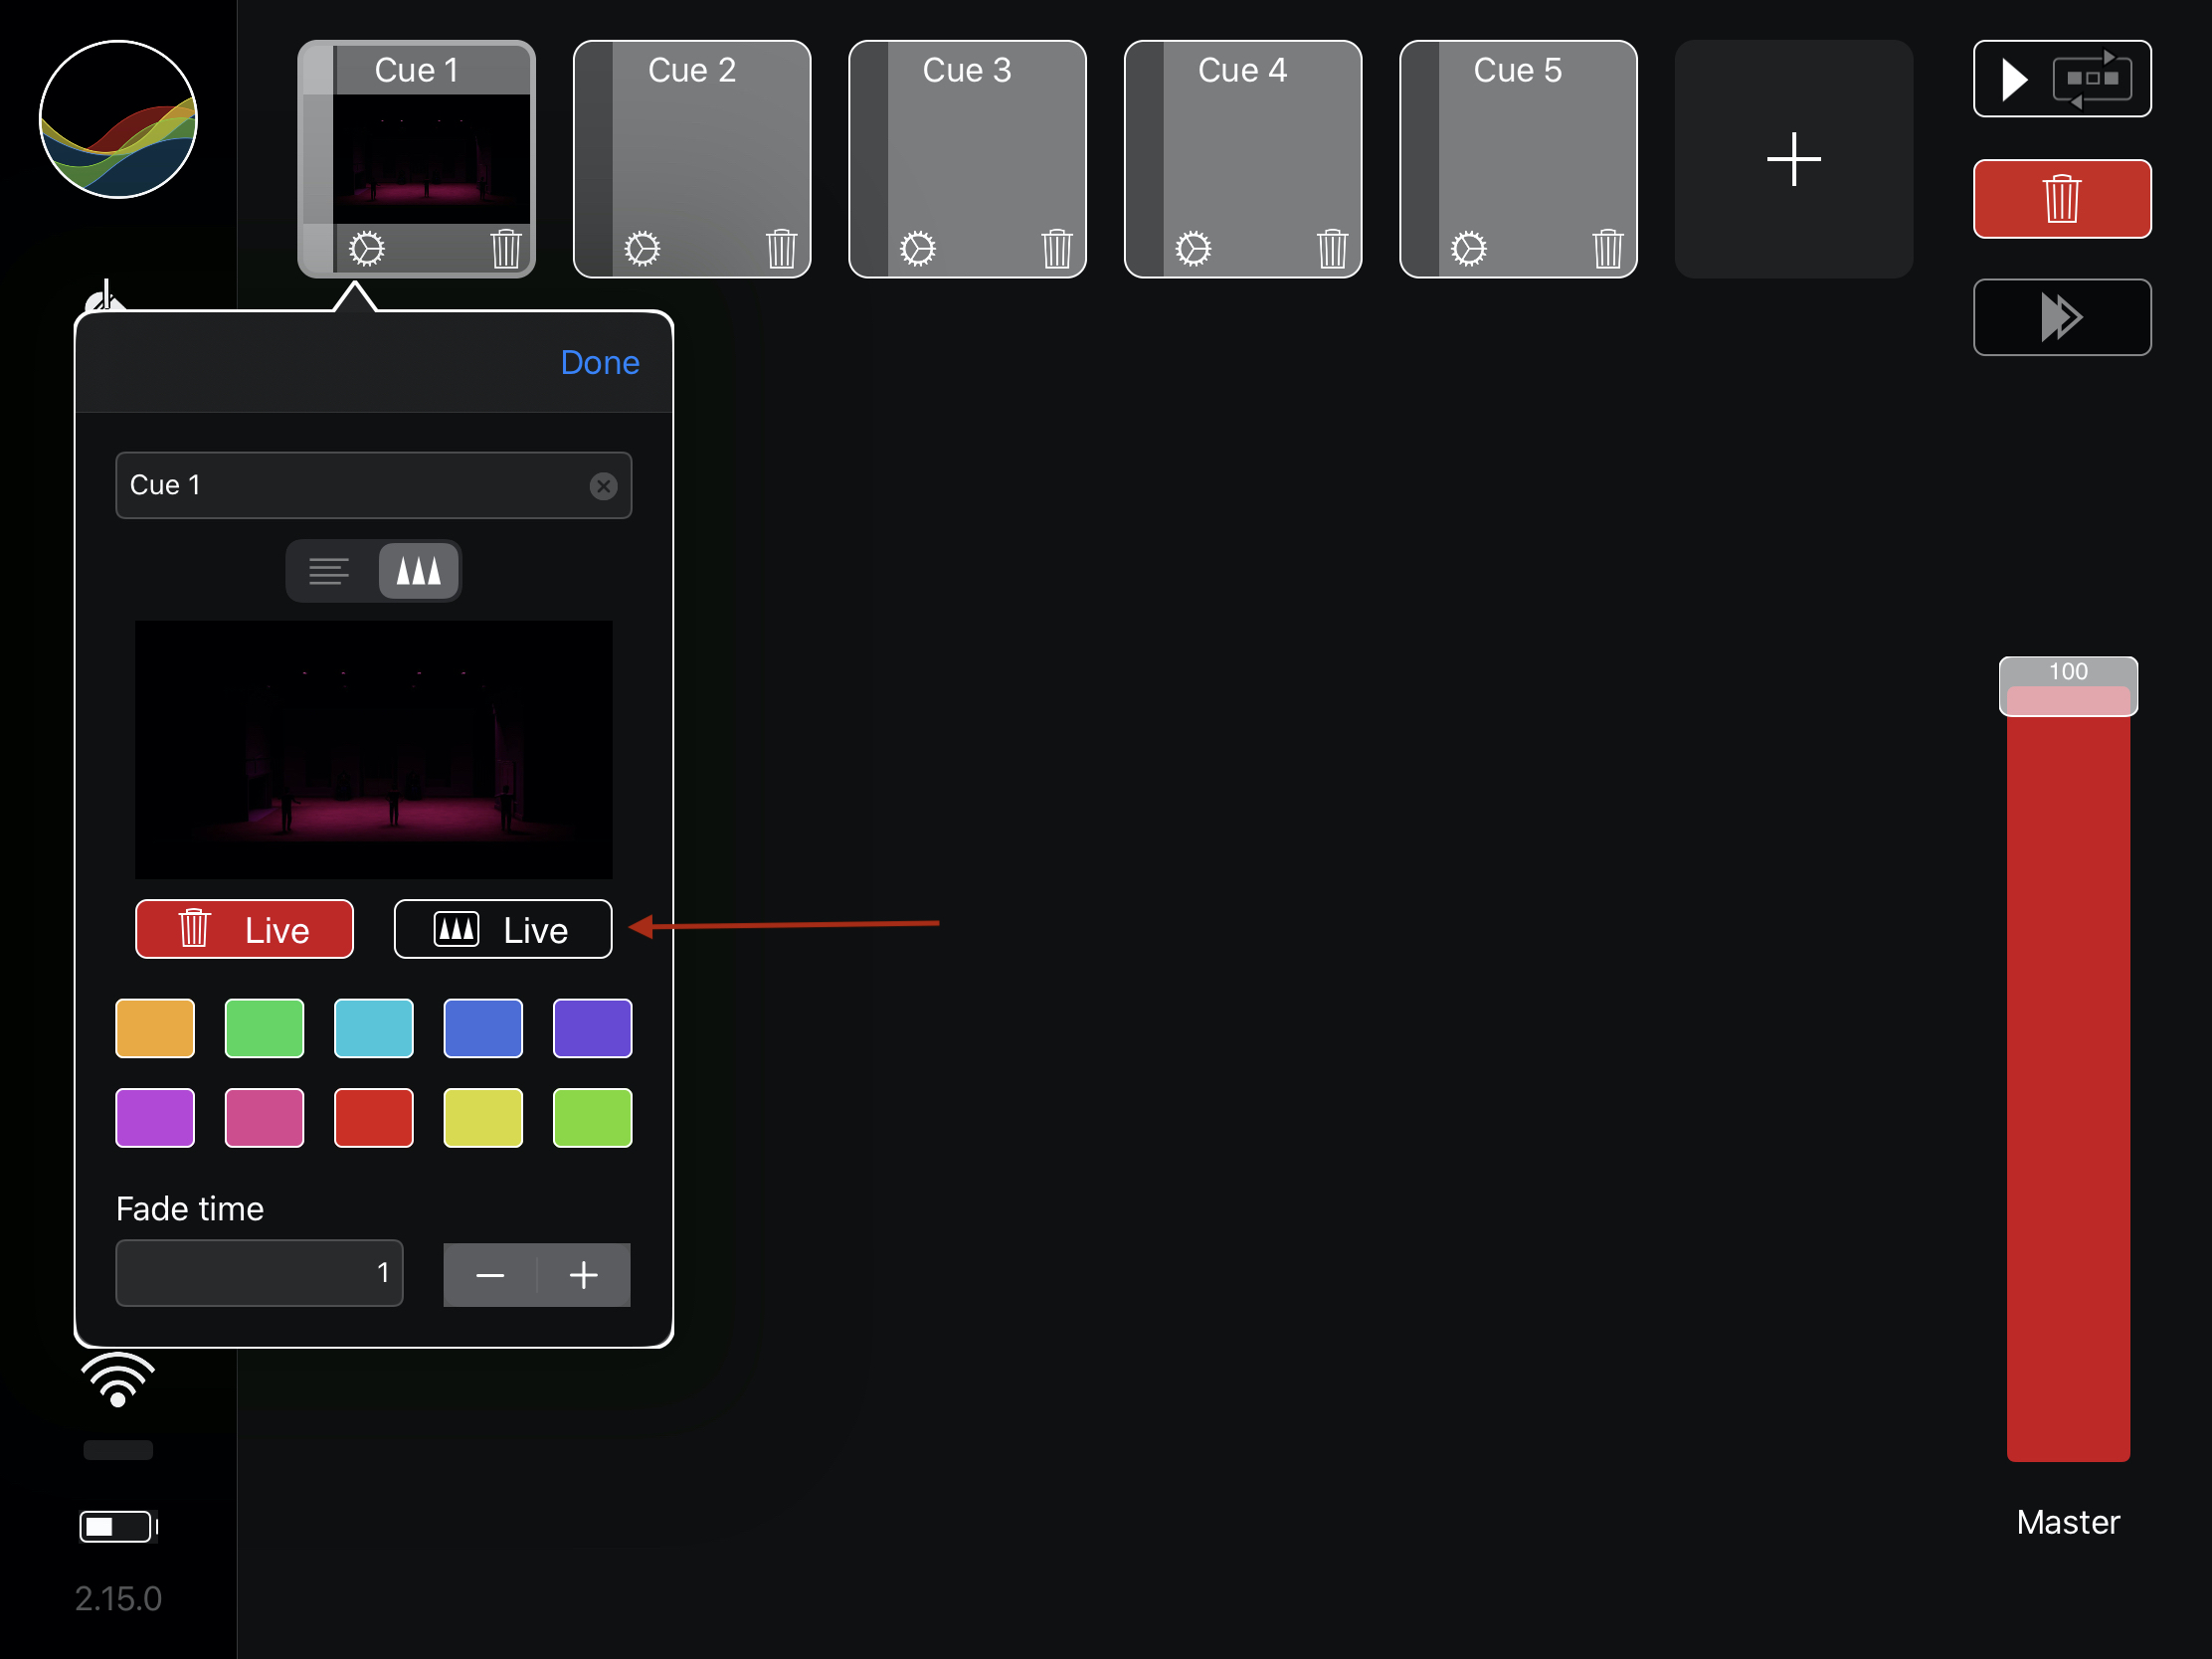
You can choose from different colors or change the name via the settings symbol on the cue button. For example „S1/Lx3“ for scene 1 / lighting cue 3. To use thumbnails via CITP you need Capture and at least the Premium XL package in StageLight. If CITP is activated in the settings, you can also download the thumbnail in addition to the colors and texts. This also happens automatically when creating the cues.
Now it’s up to you to try the StageLight app. You can download it for free from the App Store and test it for 14 days. You can then continue to use the app to a limited extent or „upgrade“ it with an in-app purchase.
Links: